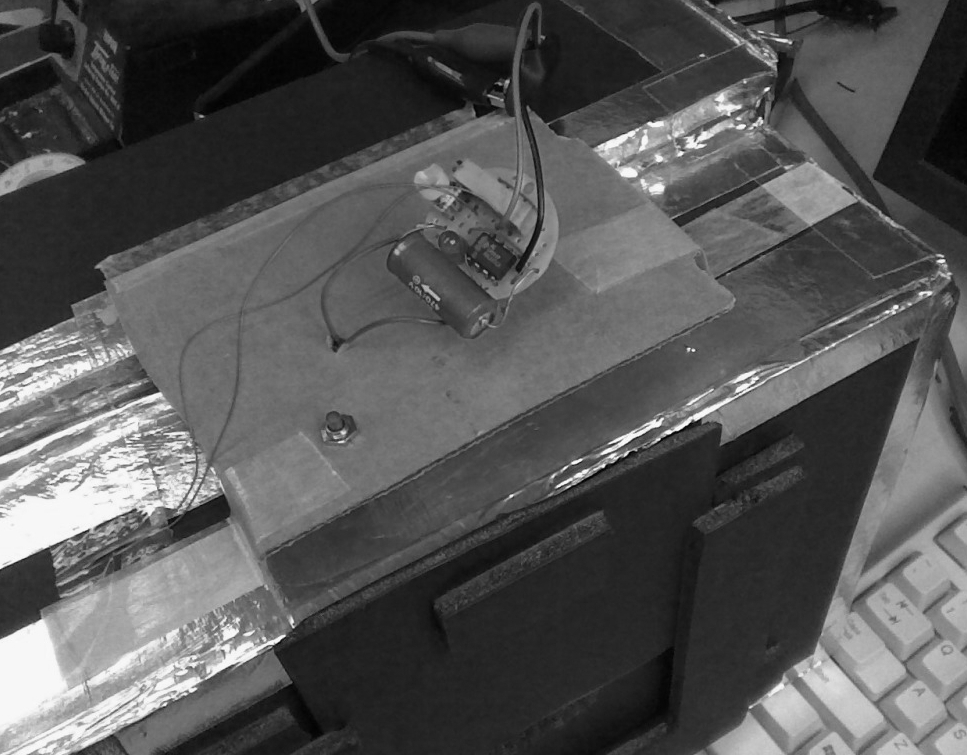
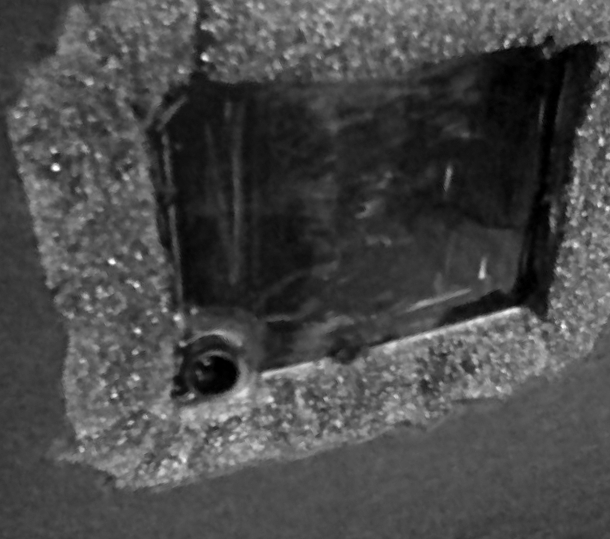
Some of the first cameras that I ever made were pinhole cameras that used paper negatives. These cameras are very simple and cheap to make and can give some very interesting images. Due to the slow nature of the photopaper negatives, exposure times can be several minutes in overcast conditions or even hours during sunrise or sunset. Calculating the proper exposure time during these situations can be impossible if the light is changing. Even something like the sun going behind a cloud can more than double the necessary exposure time. This introduces a lot of guesswork and makes getting the desired exposure frustrating.
I have photographic exposure meters, but I always accidentally leave them at home, and properly monitoring exposure would require taking intermittant readings and calculating a real-time updated picture of current negative exposure, which would be way too complicated for a camera made out of an oatmeal box with a hole poked in the end. I like to set my camera up and go do something else, or think about actually doing photography, and not have to babysit it and constantly worry and second-guess my exposure.
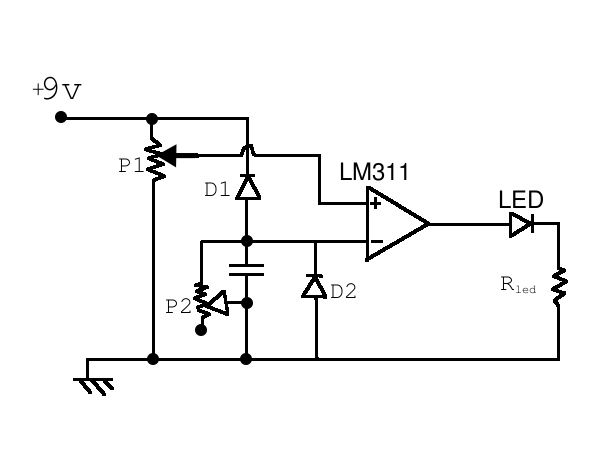
After a few too many mis-exposed negatives, I went about solving the problem by building integrating light meters into my favorite pinhole cameras. My meter design uses a 9v battery which fills up a capacitor through either a photodiode or CdS light-sensitive resistor. The voltage across the capacitor is monitored by a comparator and when it reaches an adjustable threshold value, an LED will light up indicating proper exposure has been reached.


The principle of operation is simple but effective. If there is a lot of light shining on the detector, the capacitor fills up quickly, giving a short exposure recommendation of about 30s in daylight, which can be adjusted by turning the trimmer pot that sets the threshold voltage (P1). If conditions are darker, the photodiode or LDR current will be low and filling up the capacitor will take much longer--the "dark-condition" exposure time can be adjusted with the second "low-light" trimmer pot, for a sort of 2-point calibration.
If the light level changes during the exposure, the meter will automatically compensate continuously, for perfectly exposed negatives without any work or extra stuff to carry. All I have to do is set up the camera, press the reset button to drain the capacitor, and start exposing. When the LED comes on, I close the shutter, and take the camera home to develop my perfect exposure.

Diagram of my circuit. Note that D2 is kept in the dark and both D2 and P2 are optional refinements. The second detector D2 is blacked-out. Since photodiodes have a temperature dependent dark-current, and CdS cells have a large but finite dark-resistance, this path to ground helps to cancel out the tendency of the meter to increment even in total darkness, and allows adjustment for low-intensity reciprocity failure or "Shwarzchild effect". For an even response to brightness changes, the circuit values should be chosen so that the threshold voltage ends up well below the supply voltage, since the capacitor voltage will increase approximately linearly only while it is substantially less than the supply voltage. Filtered photodiodes work well for panchromatic film, but because photodiodes are not very blue/green sensitive, CdS cells are better for paper (photopaper is not sensitive to red light).